NFC is an acronym for Near field Communication. The feature enables two phones to connect when they are close to each other.
The NFC technology is based on radio-frequency identification (RFID) standards. Like an RFID tag, a smartphone with NFC can store digital information so that can be exchanged with other smartphones or machines by tapping them together or bringing them into close proximity.
The NFC chip on your phone may not be enabled by default. In this article, we will clarify how to use NFC on ZTE Blade V9 Vita starting with how to turn it on if it’s not turned on automatically.
Does ZTE Blade V9 Vita have NFC on its system?
You will find NFC ZTE Blade V9 Vita, but just for devices that are produced in Russia.
How to turn on NFC on ZTE Blade V9 Vita?
It’s so important to know how to use NFC on ZTE Blade V9 Vita in terms of paying, sharing data to save your time, but you need first to activate the feature by go to the settings then connection and sharing. After that, swipe up, and enable the NFC switch. You can also activate the N-mark from the notification centre. Swipe down from the home screen and activate the icon.
It’s not a complicated process to activate NFC on ZTE Blade V9 Vita as you just need to go to settings, advanced settings, then choose NFC and enable it by turning on the switch. For how to use NFC on ZTE Blade V9 Vita, continue reading the next paragraphs.
The NFC chip on your phone may not be enabled by default. If you want to use this technology on your device then the first thing you need to do is swich the mode from OFF to ON. To activate NFC on ZTE Blade V9 Vita, go to settings, choose connected devices and then activate NFC.
Scanning NFC tags on ZTE Blade V9 Vita
Scanning an NFC tag on ZTE Blade V9 Vita comes after downloading a writing app like TagWriter by NXP. You just need to open the app, and hold your phone close to the tag then scan it. The following paragraphs explain more about downloading and using writing apps.
Transferring files using NFC on ZTE Blade V9 Vita
To send data from ZTE Blade V9 Vita, NFC should be turned om as explained before. Also, you need to activate Android Beam from NFC settings, more or share and connect, then enable the Android Beam. After activation, follow these steps to accomplish sharing data process:
– Open Gallery or your phone files.
– Choose the file or data you want to share it.
– Tap on share icon.
– Tap on NFC icon.
– After connecting with the other device, choose tap to share.
On many devices, the beam is activated automatically when you turn on the NFC. Also, some devices requires you to tap on the Android Beam icon after you tap to share the file or the photo. So, you need to tap on the icon, then continue the other steps as usually.
NFC Apps on ZTE Blade V9 Vita
When it comes to NFC tags for task automation on your device, you need a third-party app. For make payments, you need an NFC payment app.
These apps help you make the most of your phone features in no time with no hassle.
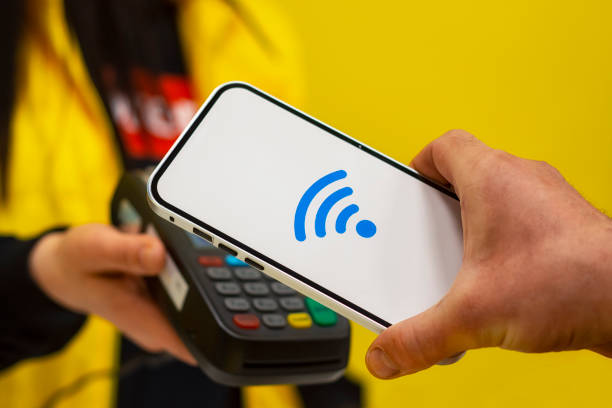
How to make contactless payments through the Google pay app?
To make payments with NFC on ZTE Blade V9 Vita, you need to enable tap & pay feature from settings, all settings, and tap to pay. Also, you need to Install Google pay and insert your card details. Whenever you need to pay, open the app and hold your phone near the other device and tap to see the notification on the display.
How to install NFC writing apps for android?
Firstly, you need to turn on NFC on your ZTE Blade V9 Vita. After that, ensure that you have a blank NFC tag or buy a one. Next, install Writing app (NXP tagwriter).
Open the app and follow the text below to write the tag with it.

How to write NFC tags using the TagWrtier-NXP app?
Follow the clarification below to start with how to write an NFC tag:
– Open the app.
– Press on write tags in the top right.
– Choose new data set.
Press on link (You can choose anything from the list).
– Insert the link type.
– Enter the domain in the other field.
– Select save and write.
Now click on write, then hold your phone near the tag to scan it till the confirmation appear on the screen.
What is the storage capacity you need to write NFC tag?
The memory you need to write an NFC tag is not the same because if you want to write or store a web address, you will need 19 bytes, while you need 68 bytes for SMS. As for Emails, it requires at least 83 bytes.
Everything you need to know to use NFC on ZTE Blade V9 Vita
Using NFC on ZTE Blade V9 Vita requires you to be familiar with ZTE Blade V9 Vita NFC settings that include :
– Turning on NFC: A process of activating NFC from settings.
– Using the antenna: A sensor makes it possible to share data wirelessly.
– Scanning: Making contactless communication between two phones using the NFC sensor.
– Paying: using the NFC feature to make contactless payments.
– Transferring data: Sending data from one device to another by using NFC.