The Near field communication (NFC) feature allows mobile device users to send content by touching them together or bringing them into contact with an NFC tag embeded in a poster or advertisement.
Mobile devices detect the tags and load information from the tags when determining what action to take on the content, such as open a URL in a browser, send it as an SMS message or call the number listed on the tag. In this article we will focus on sharing data and paying with NFC in ZTE Blade V9 Vita.
Does ZTE Blade V9 Vita have NFC as a wireless technology?
You will find NFC ZTE Blade V9 Vita, but just for phones that produced in Russia.
How to turn on NFC on ZTE Blade V9 Vita? – NFC activation process
You can activate NFC on ZTE Blade V9 Vita from the main screen by swiping down from the top then tapping on the NFC icon and it will be enabled. Also, you can activate the feature from settings:
– Go to settings.
– press on connections and sharing.
– Swipe up to find NFC.
– Turn on the NFC switch.
You can turn the feature off whenever you want especially if you want to save your phone power. If you don’t know how to use NFC on ZTE Blade V9 Vita in terms of paying and scanning tags, continue reading this article as everything about NFC will be clarified.
Activating NFC on ZTE Blade V9 Vita is so easy as you just need to go to settings, more advanced settings, and choose NFC, then tap on the switch to activate it. Continue reading how to use NFC on ZTE Blade V9 Vita in terms of paying and transferring files.
Just like Wi-Fi and Bluetooth, you need to enable NFC by going to settings on your phone, then tap on share and connect and simply power NFC.
How do I scan the NFC tag on ZTE Blade V9 Vita?
In order to scan a tag with an NFC scanner on ZTE Blade V9 Vita, it is first necessary to download a tag writer app like NFC TagWriter by NXP.
After learning how to install and use the NFC writing apps by reading the next paragraghs, you then just need to hold your phone near the tag and scan it.
How to transfer data using NFC from ZTE Blade V9 Vita to an Android smartphone?
Download “send anywhere” app in both devices. In the first device, open the app and tap on share option in the top left corner. As for the other device, tap on yes I agree and close the window. Next, in ZTE Blade V9 Vita, tap on:
– Newly installed apps.
– Send anywhere.
– Media files from screenshot or another folder.
Now remove the mark from the first two options and keep it for the files you want to send them. Next, click on send and got it.
– press on the upper right icon
– Choose while using the app.
– press on the arrow in the bottom left corner.
Now Insert the key you see in ZTE Blade V9 Vita on the other device, then choose while using the app. In ZTE Blade V9 Vita , tap on yes I agree then close the window and tap on the photo or file in both phones.

Does ZTE Blade V9 Vita have apps for NFC?
To write NFC tags for task automation on your ZTE Blade V9 Vita, you need third-party apps, while to make payments you need NFC payment apps. These apps help you to use your phone features effortlessly with no need to do many tasks manually.
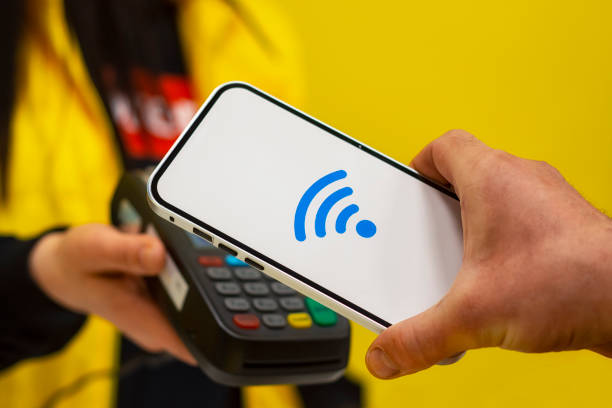
How to use Google pay app for contactless payments?
To make payments with NFC on ZTE Blade V9 Vita, you need to enable tap & pay feature from settings, all settings, and tap to pay. Also, you need to Install Google pay and insert your card details. Whenever you need to pay, open the app and hold your phone near the other device and tap to see the notification on the display.
How to install NFC writing apps for android?
Firstly, you need to turn on NFC on your ZTE Blade V9 Vita. After that, make sure that you have a blank NFC tag or buy a one. Next, download Writing app (NXP tagwriter).
Open the app and follow the text below to write the tag with it.
How to Write NFC tags on ZTE Blade V9 Vita
To write a tag in order to automate task by scanning it with your phone, follow the clarification below:
– Open the app you download.
– Press on write tags in the top right.
– Choose new data set.
Let’s assume that you choose “link”:
– Choose its type.
– Enter the domain in the other field.
– Select save and write.
In the next screen, all options are unckecked. Click on write, then hold your phone close to the tag to see the confirmation on the screen.
How much memory do I need to write NFC tag?
The memory you need depends on the form of data, if you want to store text it will take 26 Bytes. On the other hand, a web address requires 19 Bytes, and SMS requires 68 Bytes. As for Emails you will want at least 83 Bytes.
Everything you need to know to use NFC on ZTE Blade V9 Vita
Using NFC on ZTE Blade V9 Vita requires you to be familiar with ZTE Blade V9 Vita NFC settings that include :
– Turning on NFC: A process of activating NFC from settings.
– Using the antenna: A sensor makes it possible to share data wirelessly.
– Scanning: Making contactless communication between two phones using the NFC sensor.
– Paying: using the NFC feature to make contactless payments.
– Transferring data: Sending data from one device to another by using NFC.